how to view, render and download your design in the kaboodle 3D planner
Learn how to view your design, create high-quality renders and download your plans and item list using our 3D planner.

You've set up your room, added your cabinetry and customised your design. Now it's time to bring everything together, view your design from different angles and download the plans and item list you need for your project.
Our planner offers a range of viewing options, high-quality renders and downloadable documentation to help you visualise your finished space and prepare for installation.
step 1: explore different design views
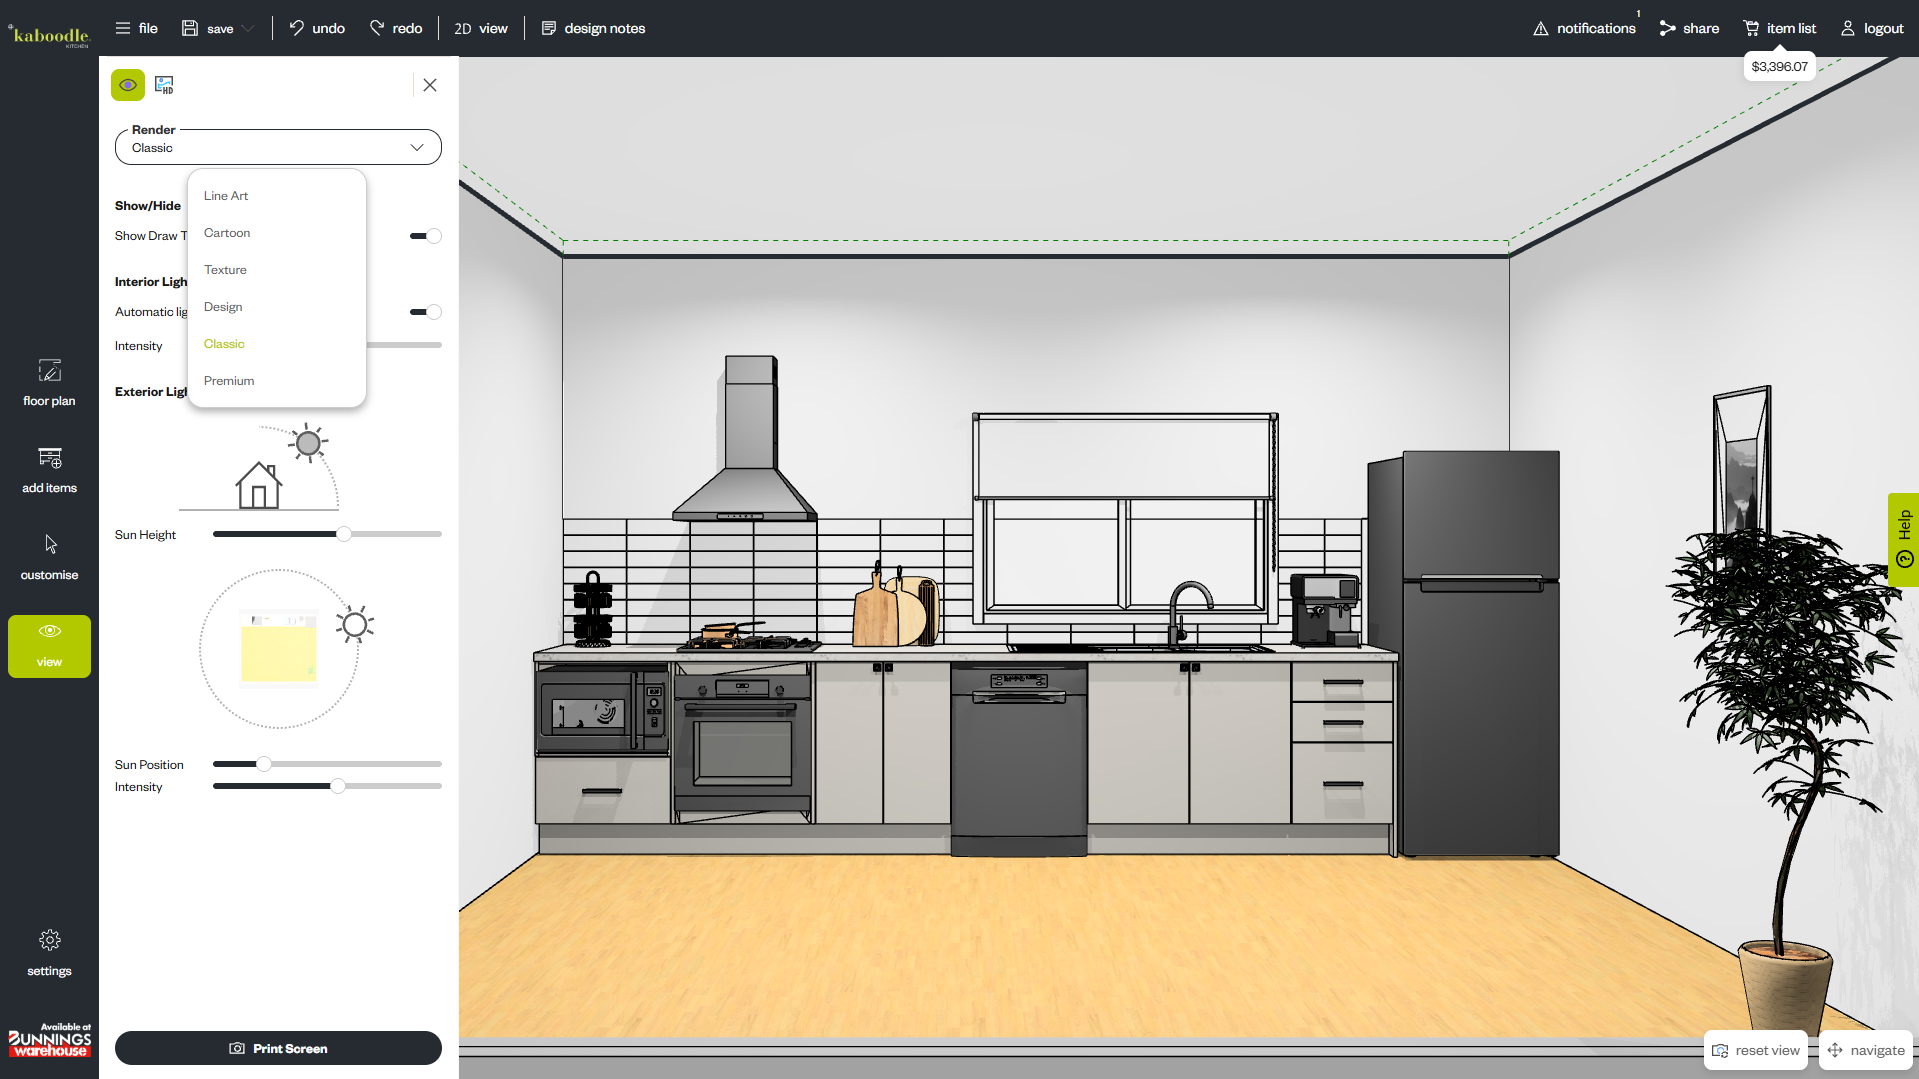
The 3D planner lets you change how your design is displayed, making it easier to visualise your space as you work.
Open the View tab to explore the available view modes. Cartoon provides a simple outline of each item, while Classic and Premium offer higher-quality renders to help you picture how your finished kitchen or laundry might look. Keep in mind that the higher-quality modes may affect how quickly your planner operates.
You can also adjust the Lighting Intensity and Sun Position to see how different colours and finishes appear under varying lighting conditions and at different times of the day.
If you want a closer look at a particular wall, use Elevation View to see it straight on. Select the wall and choose Elevation View, then use the navigation controls to move between walls.
For a quicker way to access this view, simply double-click the wall you want to inspect. Double-click it again to return to your normal design view.
Elevation views are particularly useful for reviewing cabinet arrangements, checking dimensions and getting a detailed picture of how your cabinetry will look on each wall.
step 2: capture images and create high-quality renders
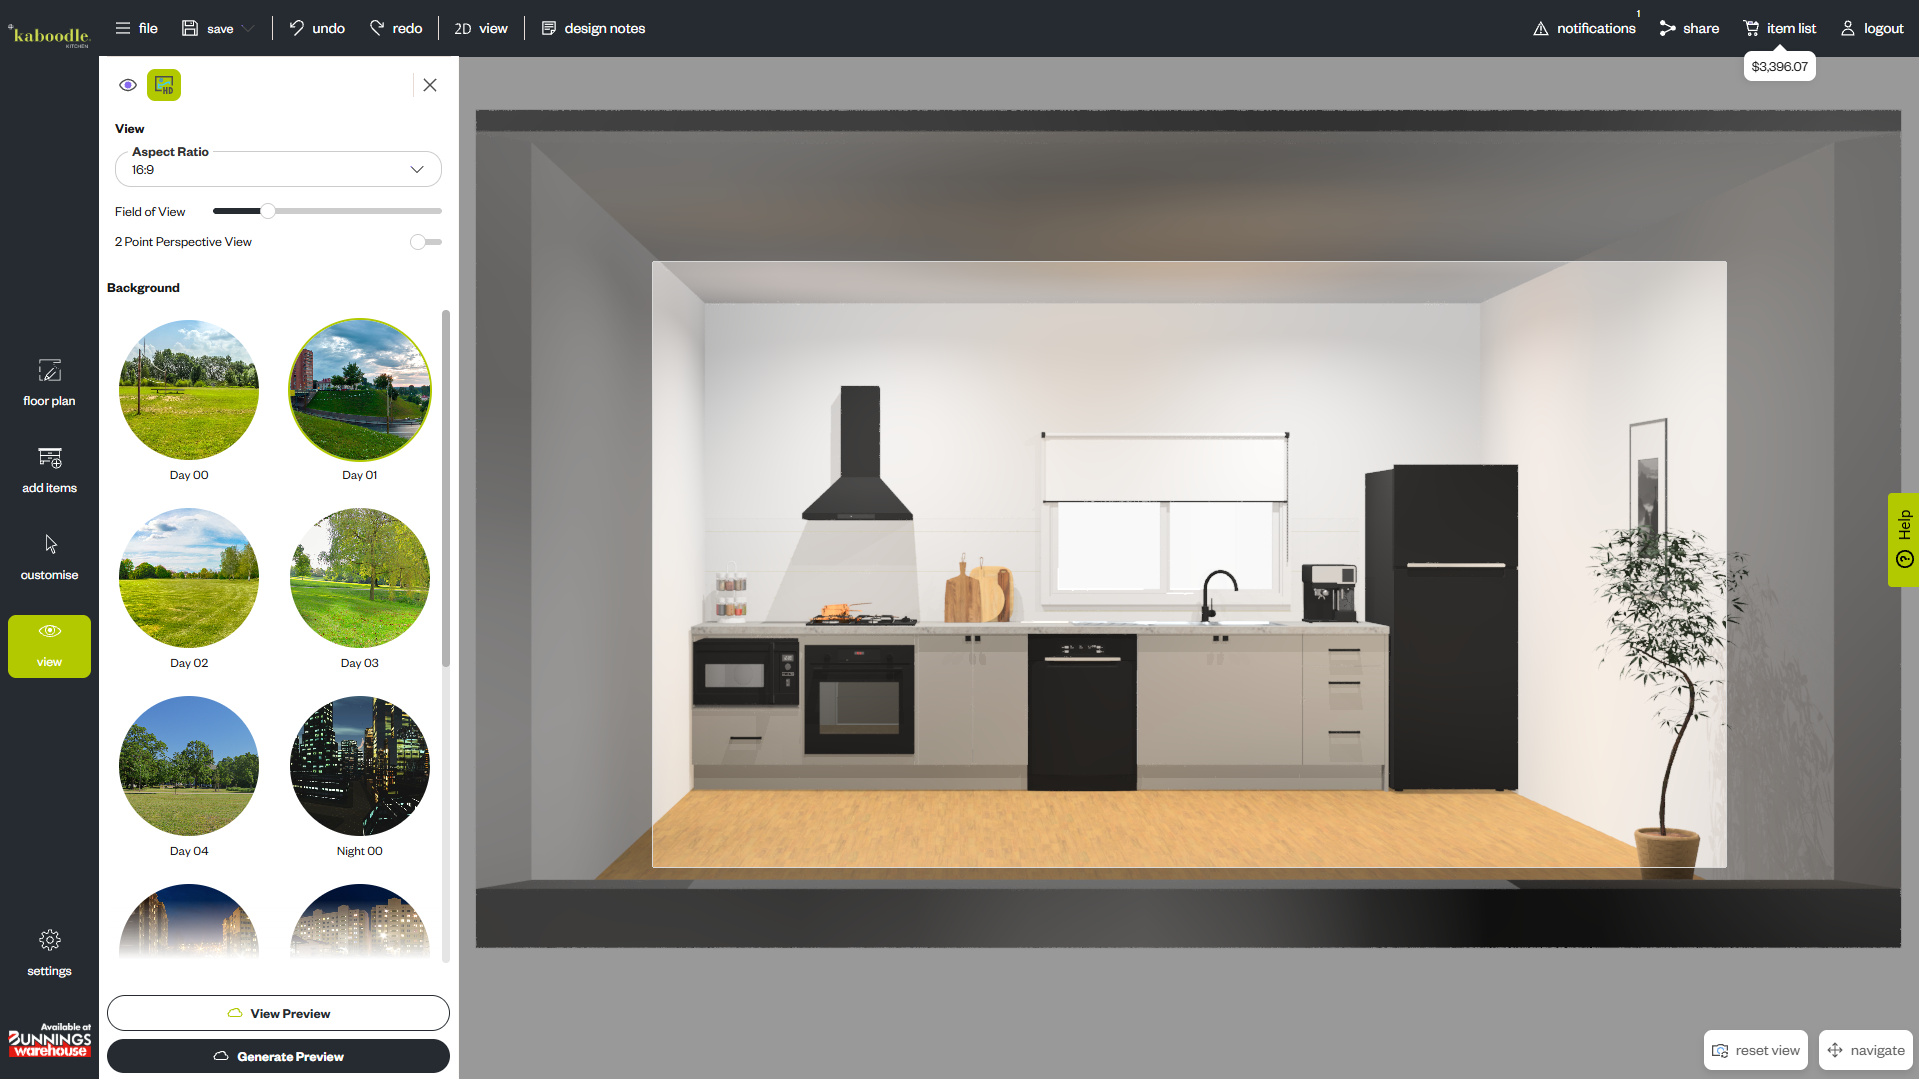
Want to save an image of your design or create a more realistic visualisation? The 3D planner lets you capture screenshots and generate high-quality renders to help bring your ideas to life.
To capture an image of your design, open the View menu and position your design at the angle you'd like to capture. If you need to start again, select Reset View to return to the default camera position.
Select Print Screen to capture an image of your current view. These images will be available in your 2D/3D Visuals when you generate your design documentation.
To generate a high-quality render, open the HQ Render tab. You can select a window background if required, then position the camera to frame your design.
Use the mouse wheel to zoom in and out, or hold down the mouse wheel to move the image and adjust your view.
When you're happy with the composition, select Generate Preview. Once the preview is ready, review the result and make any adjustments needed.
Next, choose your preferred image quality and select Generate Render. You'll receive a notification when your render is complete.
You can access all of your finished renders at any time by navigating to File > Renders, where they're ready to download or share.
step 3: download your item list
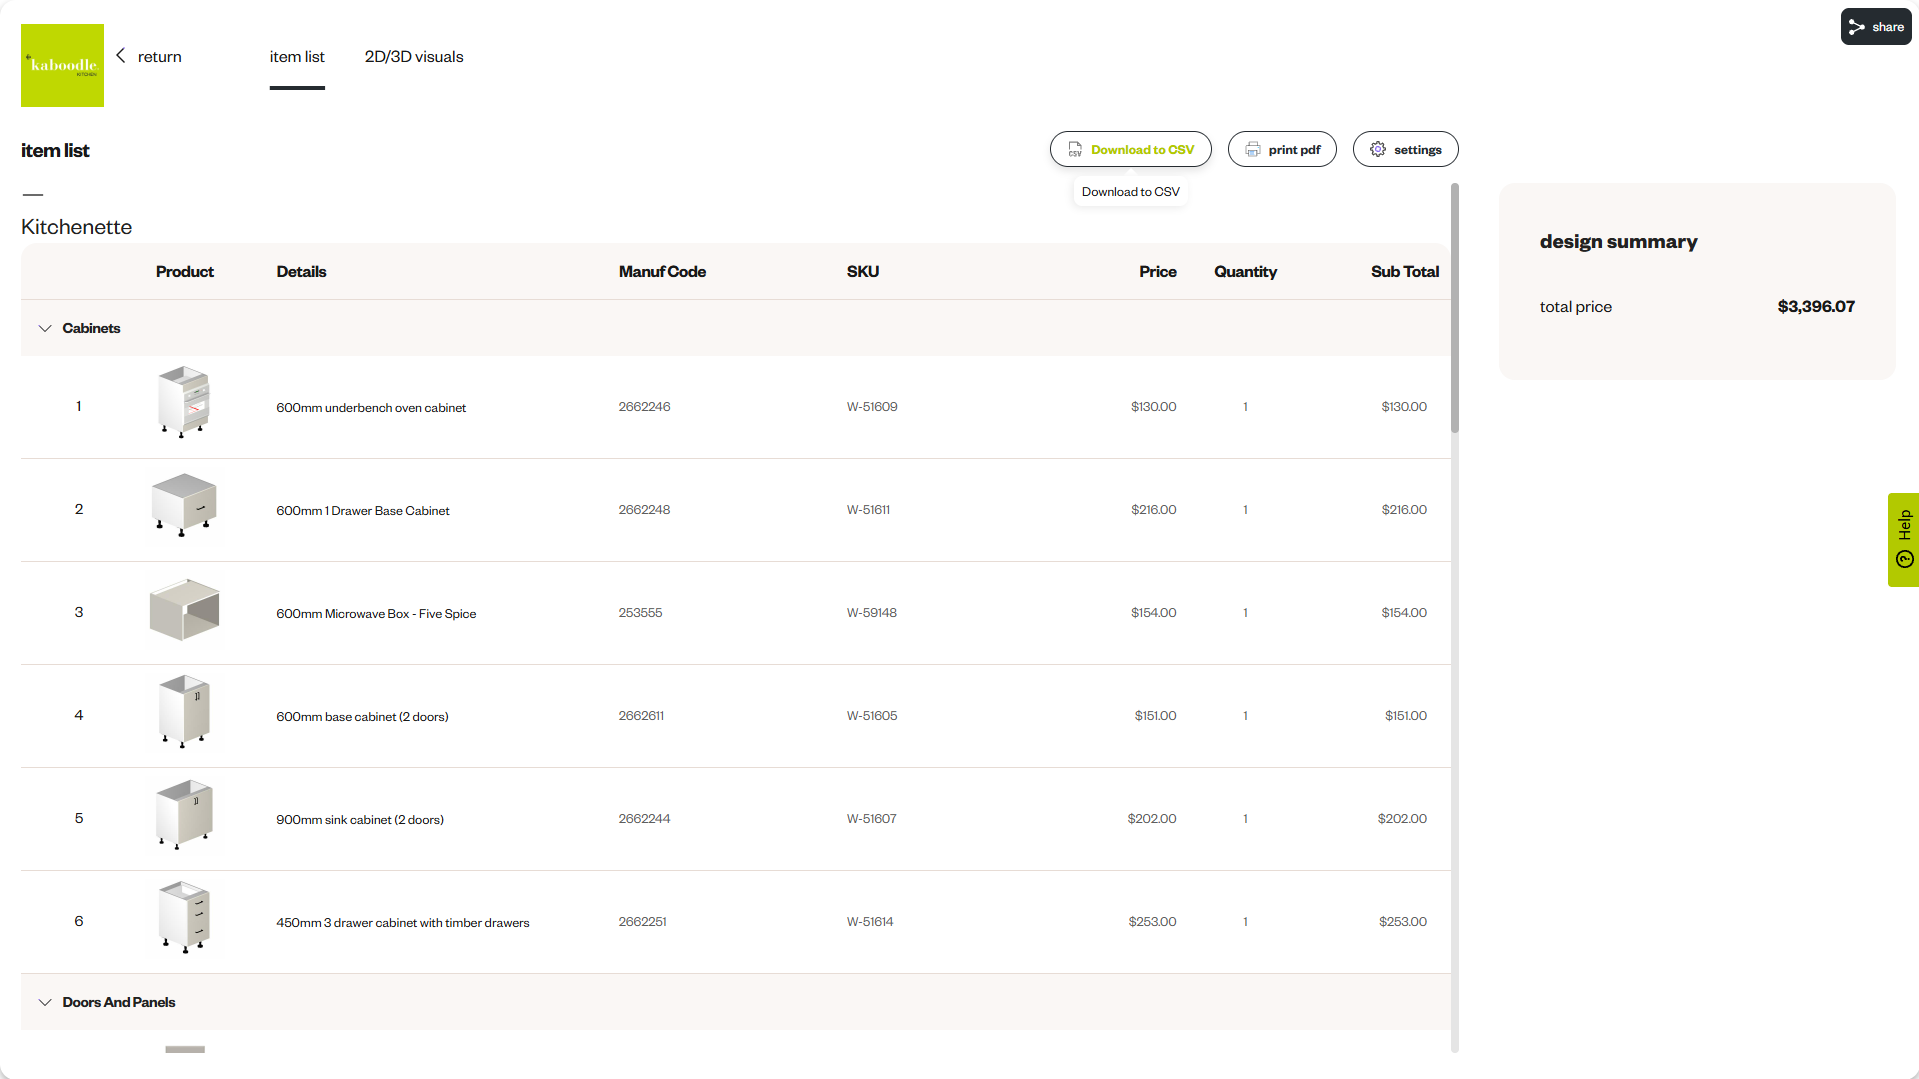
Once you're happy with your design, you can review the products you've selected and prepare for purchasing.
As you work, the 3D planner displays a running total next to the Item List button, providing an estimate of your project cost.
When you're ready, open the Item List to review the products included in your design. You can also download the list as a CSV file, which you can use as a reference when purchasing your products at Bunnings.
Reviewing your item list is a helpful way to check what you've included in your project before moving on to the next stage.
step 4: generate and download your design plans
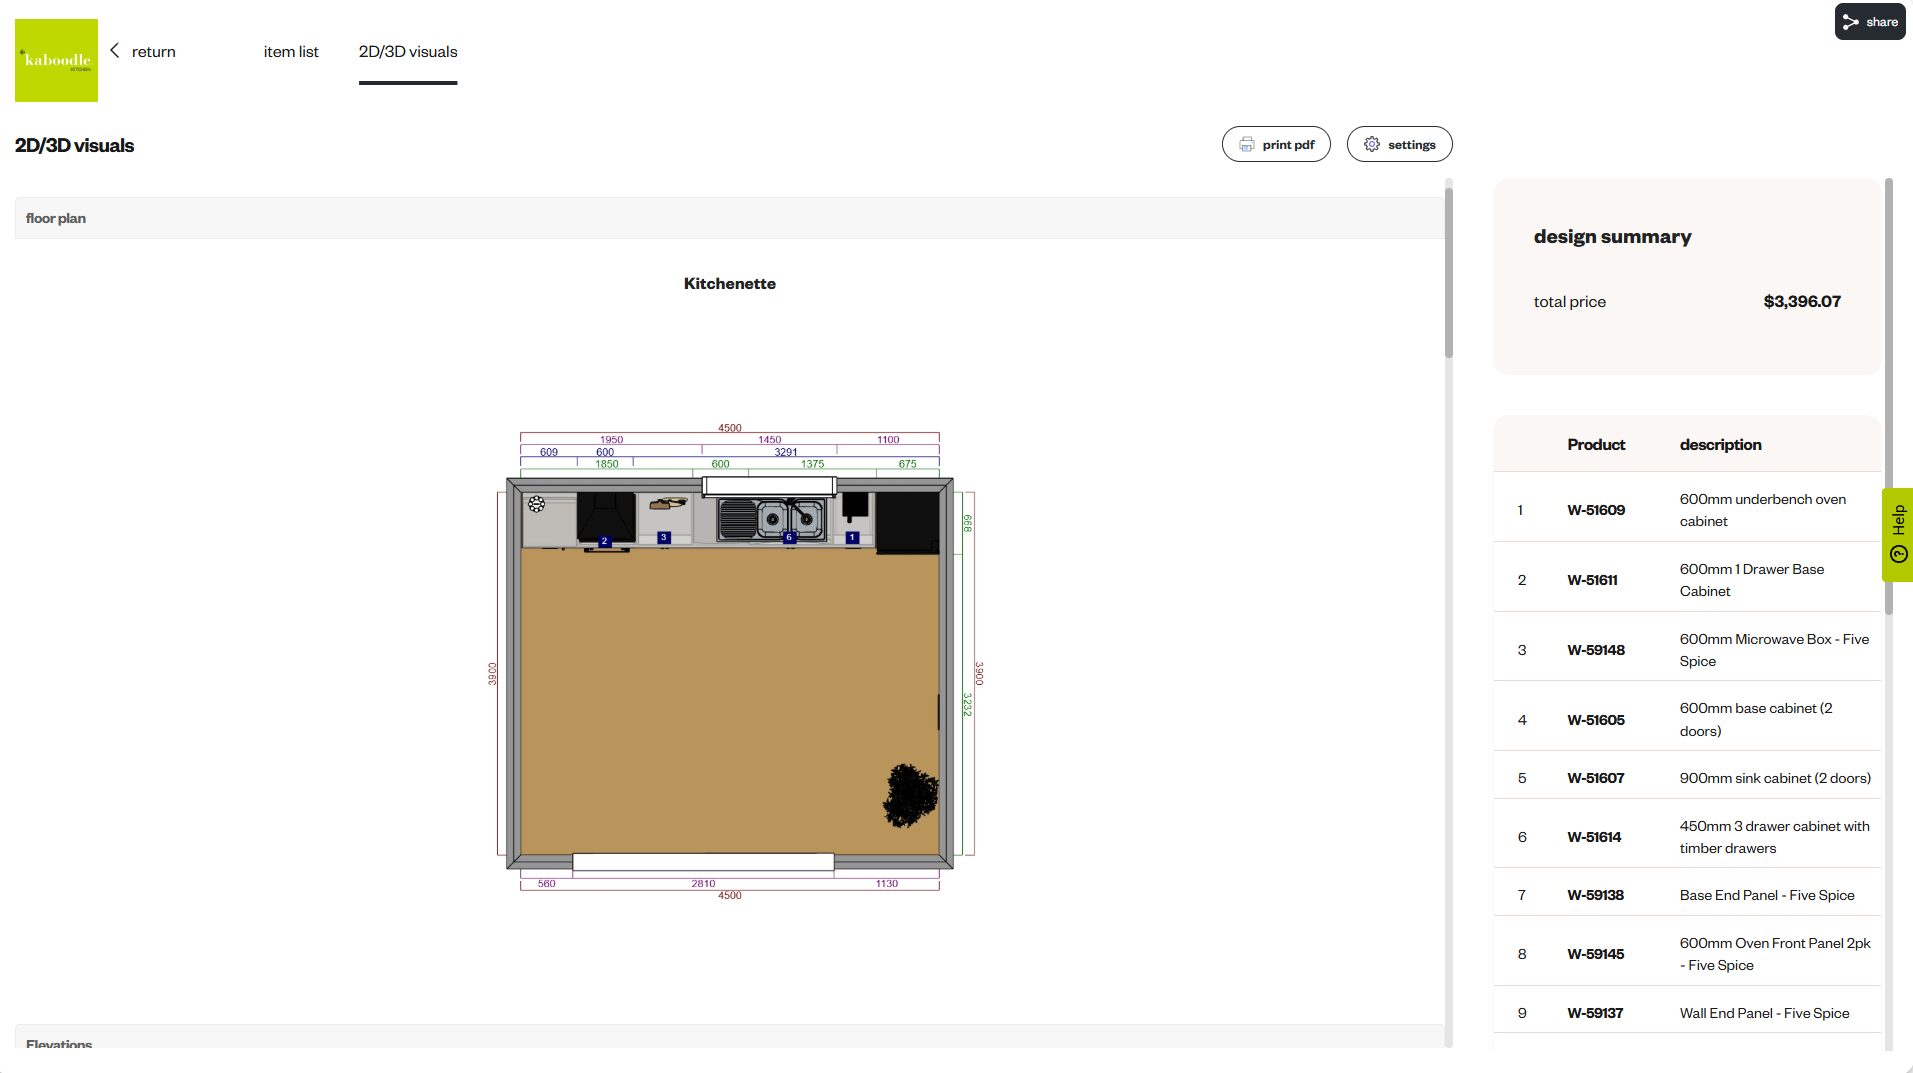
The 3D planner also allows you to create a PDF containing your design documentation, giving you a useful reference for installation.
Open 2D/3D Visuals to choose the information you'd like to include in your PDF. Depending on your needs, you can select items such as:
Item list
Floor plans
Elevations
Dimensions
Design images
Notes
Once you've selected the relevant information, choose Download PDF to generate your documentation.
If your PDF doesn't download, check that your browser allows pop-ups from the 3D planner.
Your downloaded plans can help guide you through installation, whether you're completing the project yourself or sharing the documentation with your installer.
step 5: get ready for your project
With your design complete, your renders saved and your documentation downloaded, you'll have a clearer picture of your finished kitchen or laundry and a useful reference for the next steps.
Take a final look through your plans and item list to make sure everything is correct!
For more ideas and information, visit our design blog and image gallery, or follow us on Instagram, TikTok, Facebook and Pinterest.