how to add and position items in the kaboodle 3D planner
Explore how to find, add and position cabinets, benchtops and appliances in the 3D planner to bring your design to life.

Once you've set up your room dimensions and added your doors and windows, it's time to start bringing your design to life. Our 3D planner lets you browse products, add cabinetry and appliances, customise benchtops and position items to suit your space.
Follow these steps to learn how to find the products you need and build your kitchen or laundry design.
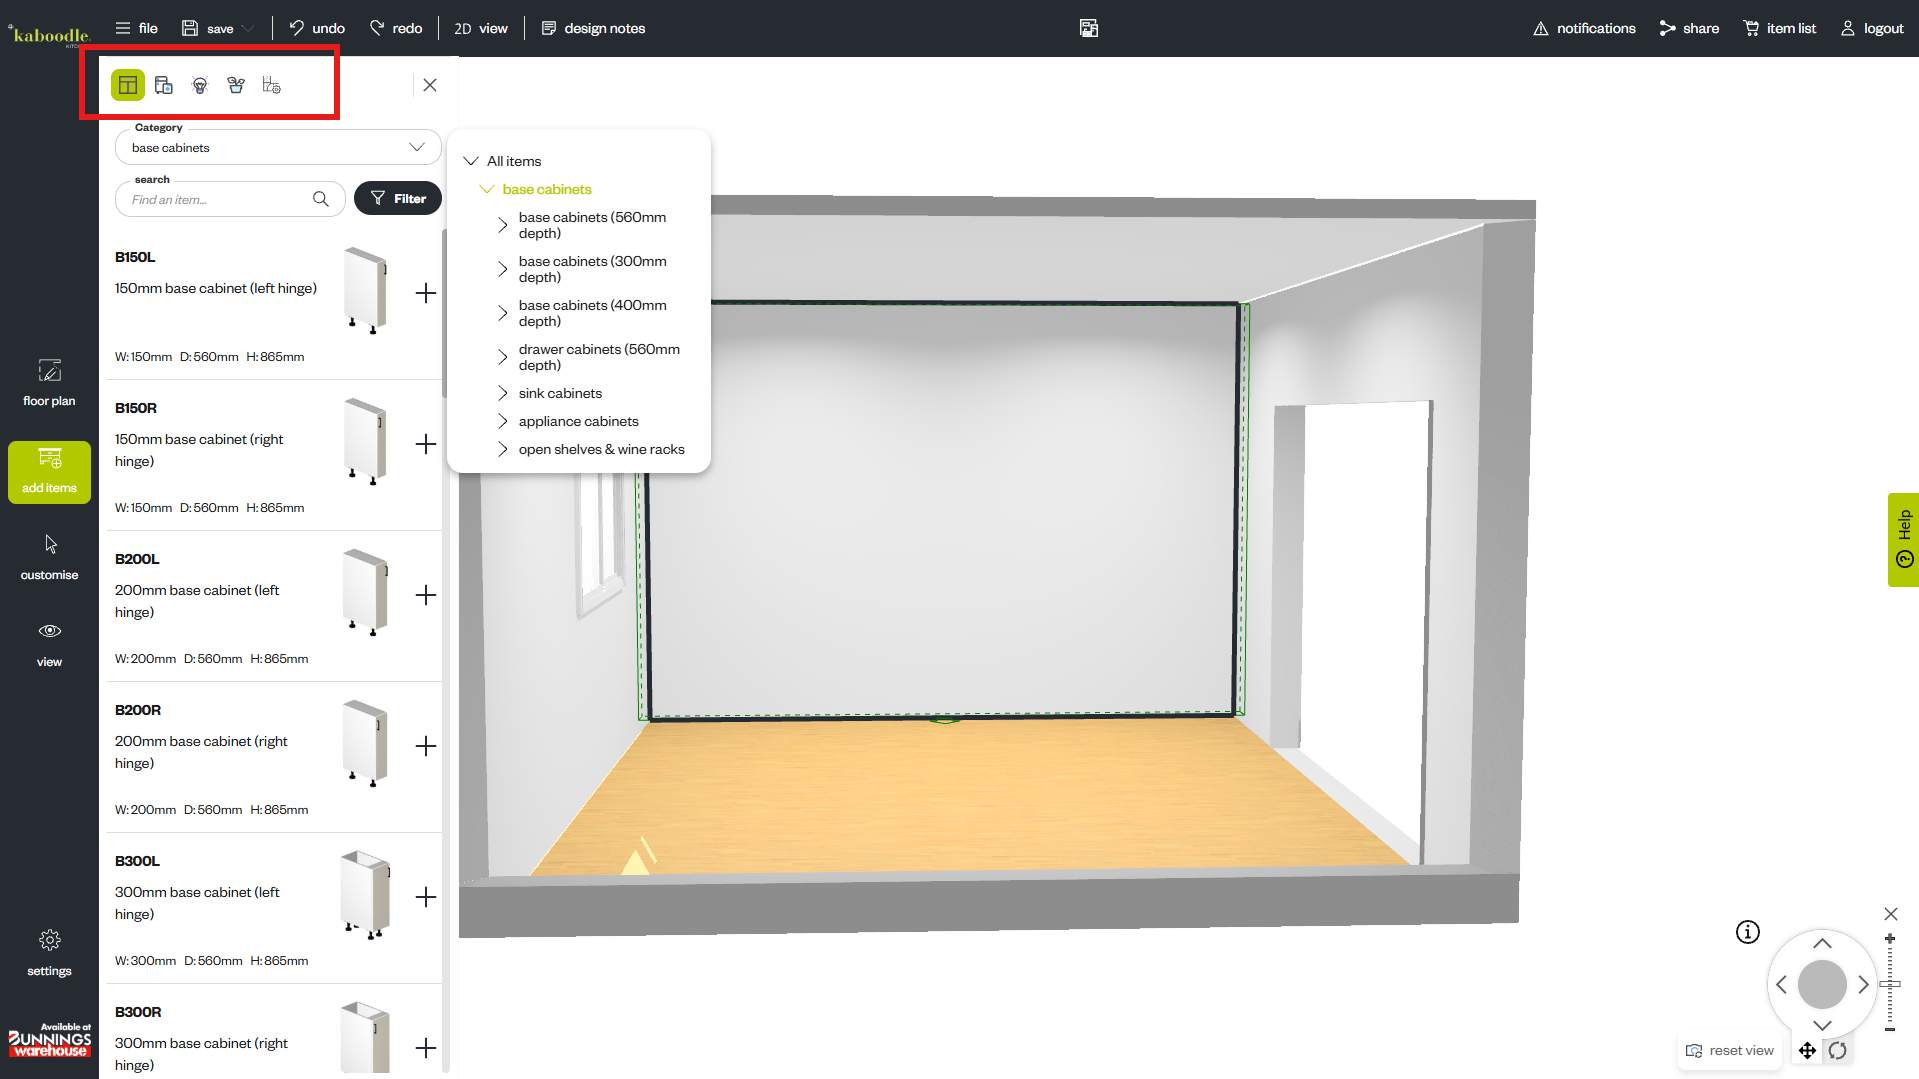
step 1: find the products you need
Start by opening the Add Items menu. By default, you'll be in the Cabinets tab, where you can browse the available cabinetry options.
Select All Items to explore the different cabinet categories. Some categories include sub-categories, making it easier to narrow down your options and find the right product.
Already know what you're looking for? Simply enter the product name into the search box.
To browse freestanding appliances, open the Appliances tab. You can search for a specific appliance or browse the available categories.
Keep in mind that appliance cabinets, designed to accommodate built-in appliances, can be found in the Cabinets tab.
You can also explore other product ranges, including lighting and decorative accessories, using the tabs along the top of the menu.
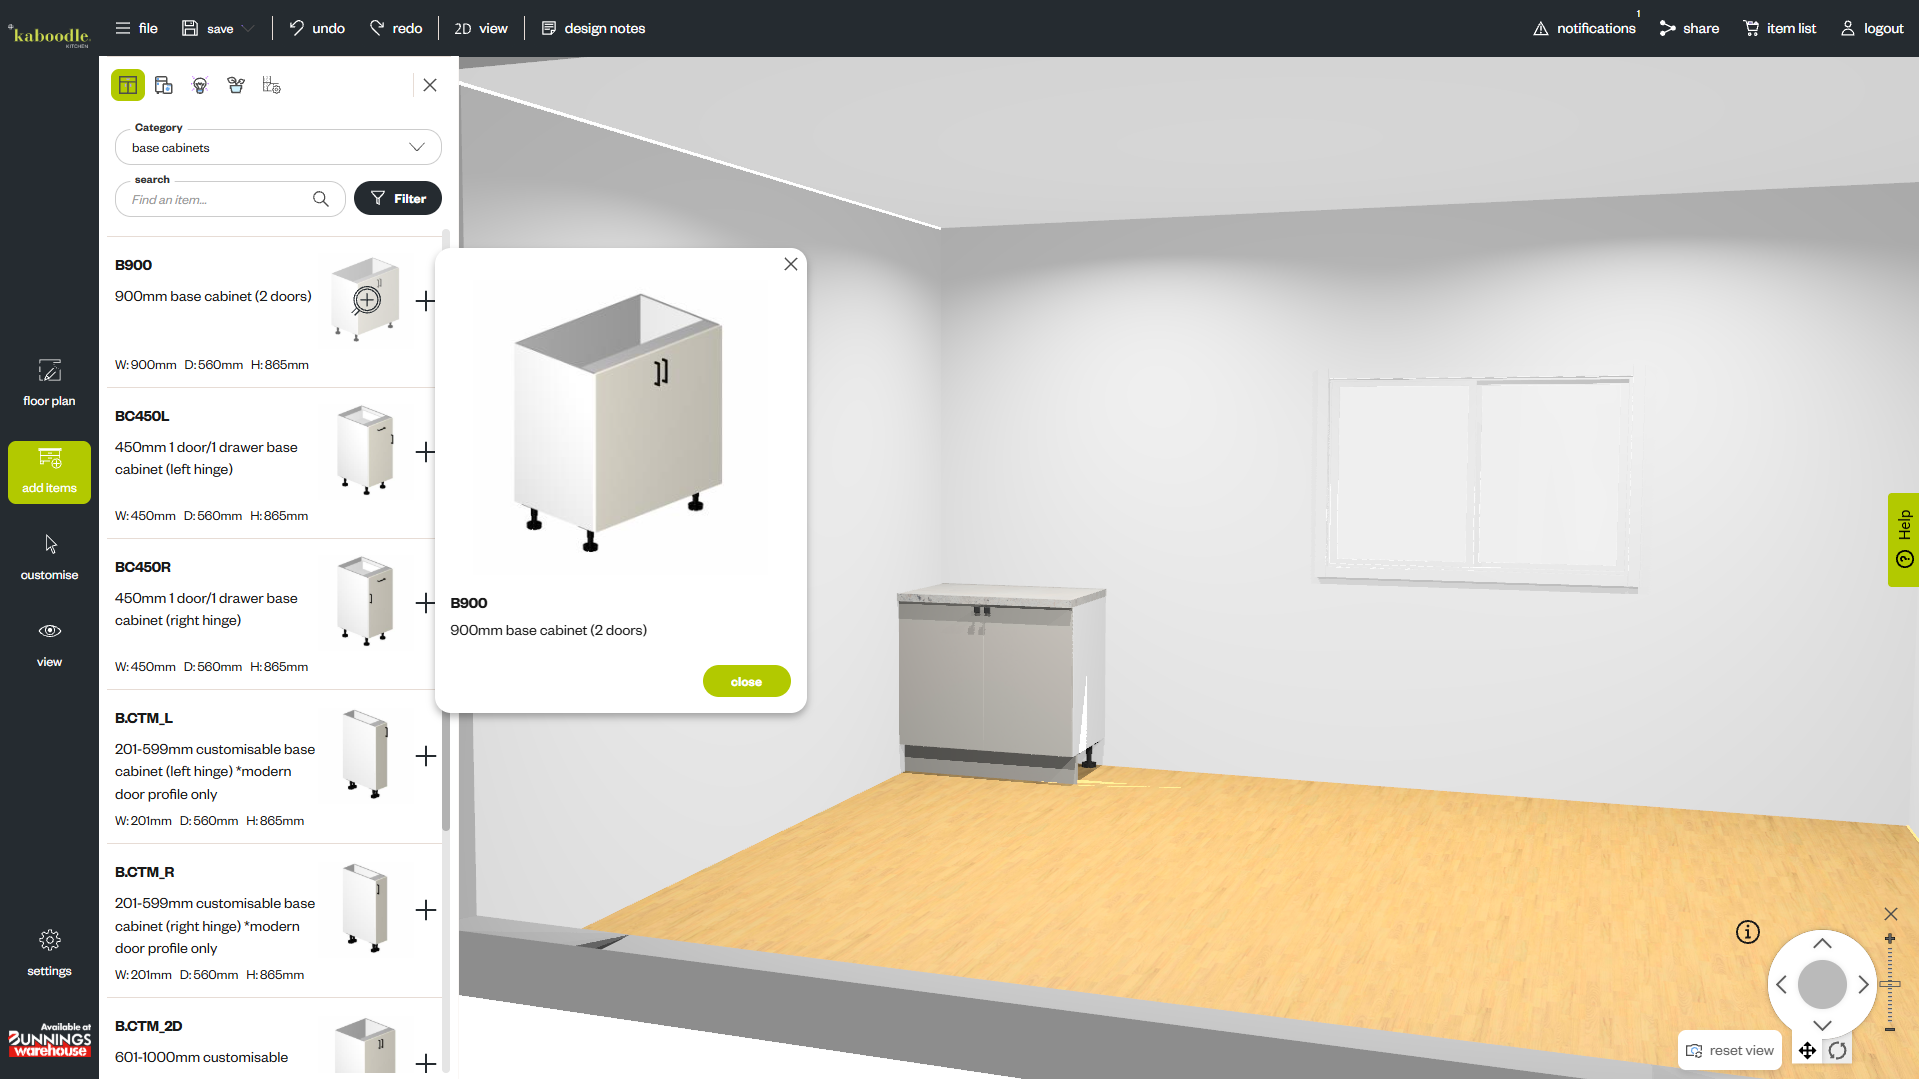
step 2: add cabinets, benchtops and appliances
Once you've found the products you need, you can start adding them to your design. Items can be added in either 2D Top View or 3D View. For this example, we'll use the 3D view to make it easier to see how your design comes together.
Open the Add Items menu and select your chosen cabinet. You can either select Add or drag and drop the item directly into your design.
You can also add finishing touches, such as an end panel to complete your cabinet run, or a freestanding fridge from the Appliances tab.
Planning for a built-in appliance? Simply select the appropriate appliance cabinet from the Cabinets tab. The appliance will be included automatically.
When you add a base cabinet, the 3D planner automatically includes a benchtop and kickboards, giving you a starting point to customise your design.
If you need to adjust your benchtop, switch to 3D View and select the benchtop piece. You can resize the benchtop by dragging the arrows or entering exact measurements in the Dimensions tab.
For example, if you'd like to create a breakfast bar, select the benchtop and change its depth to 900 mm. The benchtop will automatically update to reflect your new dimensions.
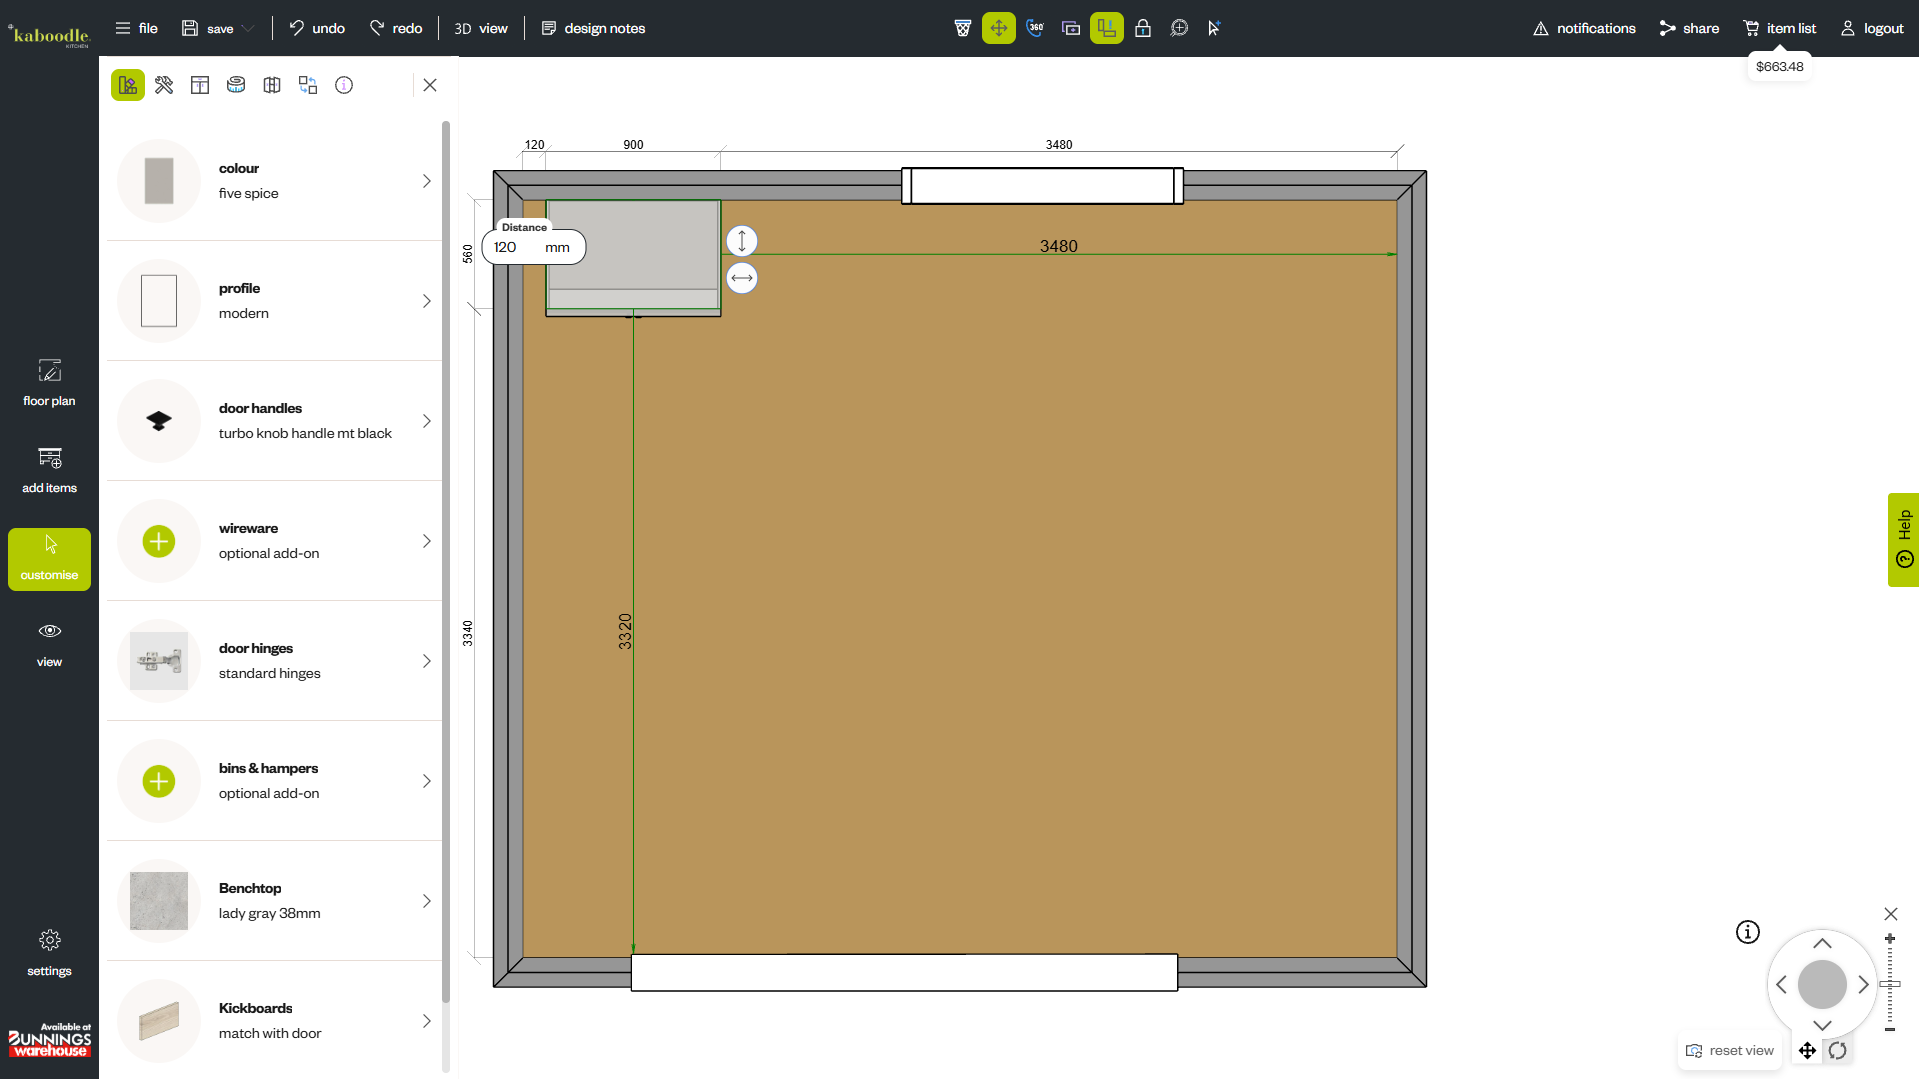
step 3: move and position items
Getting your items in the right position is an important part of creating a functional layout. You can add items using Add or by dragging and dropping them directly into your design.
In either 2D Top View or 3D View, select an item and drag it into position.
Need to move several items together? Select Multiple Selection, choose the items you want to group, then move them as one.
For more precise adjustments, use the Move tool to shift an item left, right, up or down.
If you need to move a cabinet away from a wall, it's best to switch to 2D Top View. From here, you can select the cabinet and use the arrows to drag it into the required position.
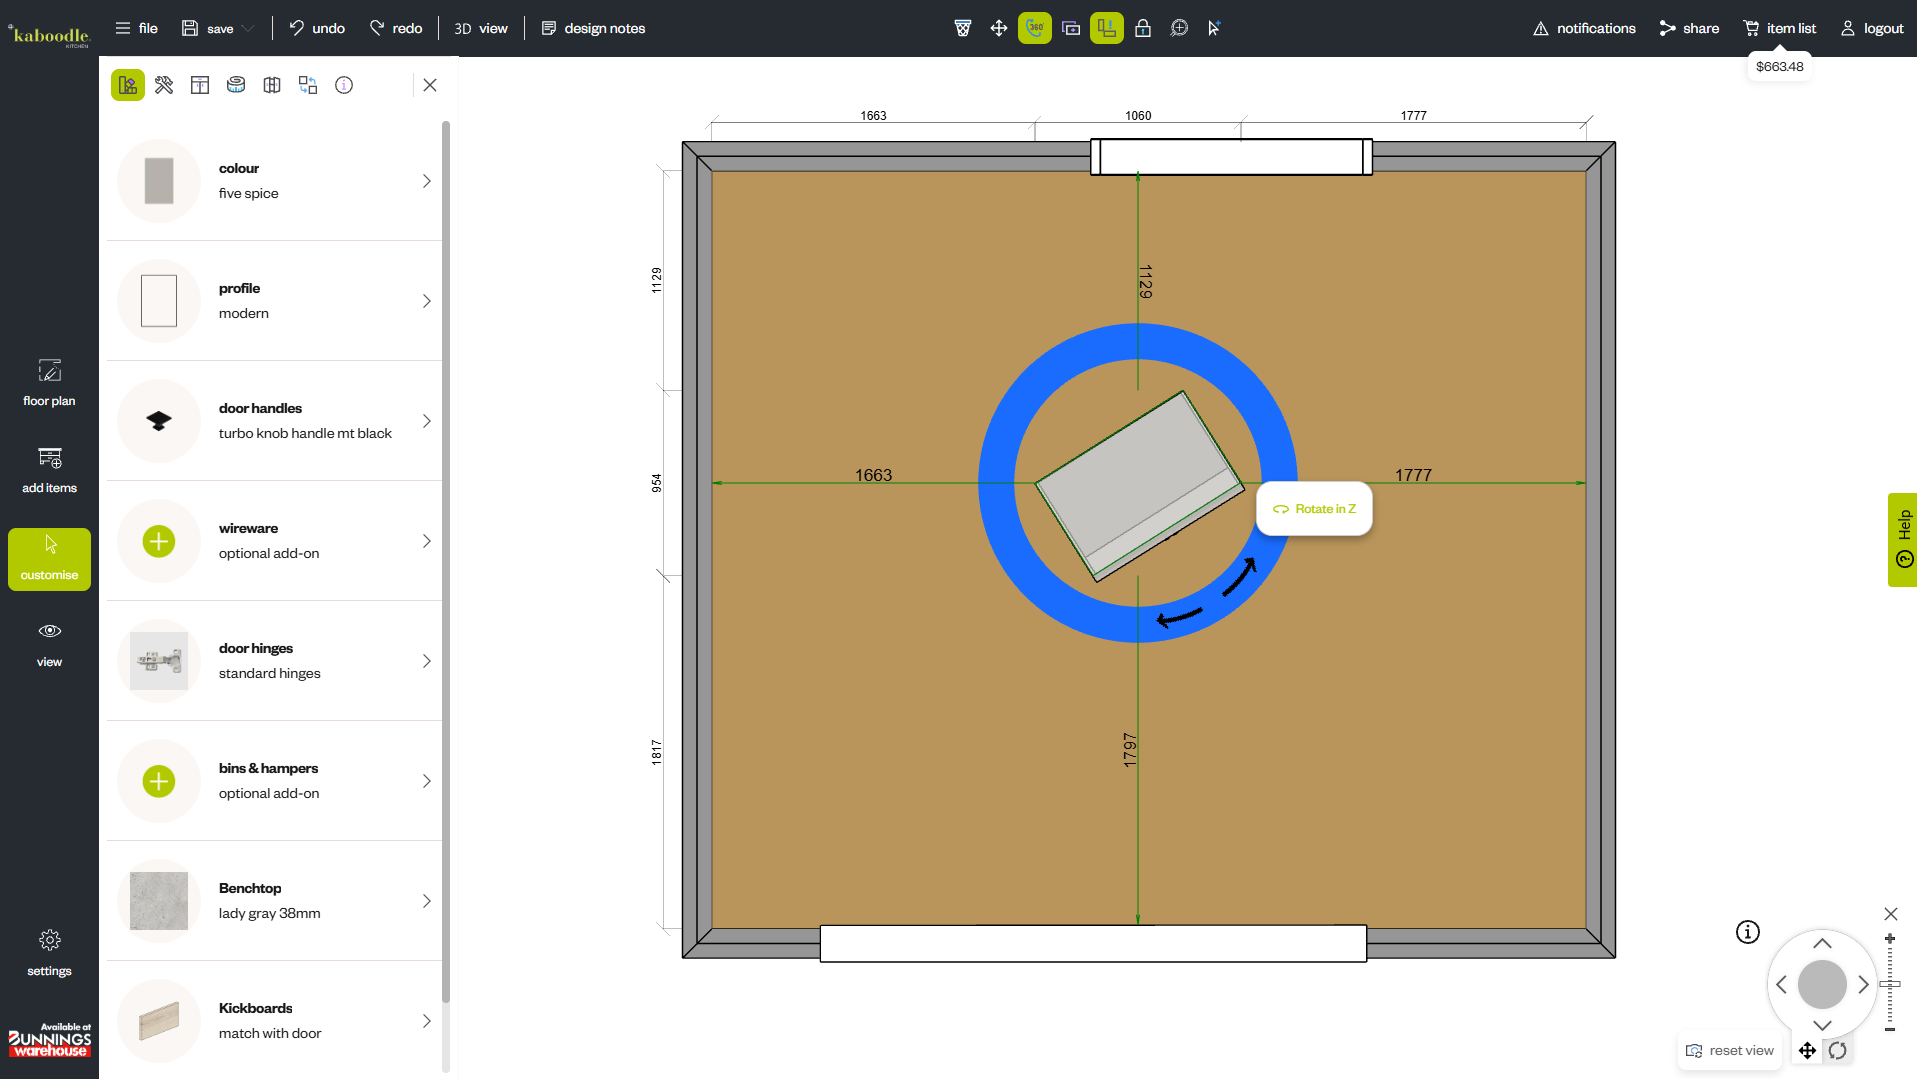
step 4: rotate items to suit your layout
Sometimes an item needs to be rotated to fit your design correctly.
To rotate an item, select it and open the Rotate tool. Choose the required axis, then drag the rotation handle until the item is orientated the way you want.
This gives you greater flexibility when arranging products and fine-tuning your layout.
step 5: review your design
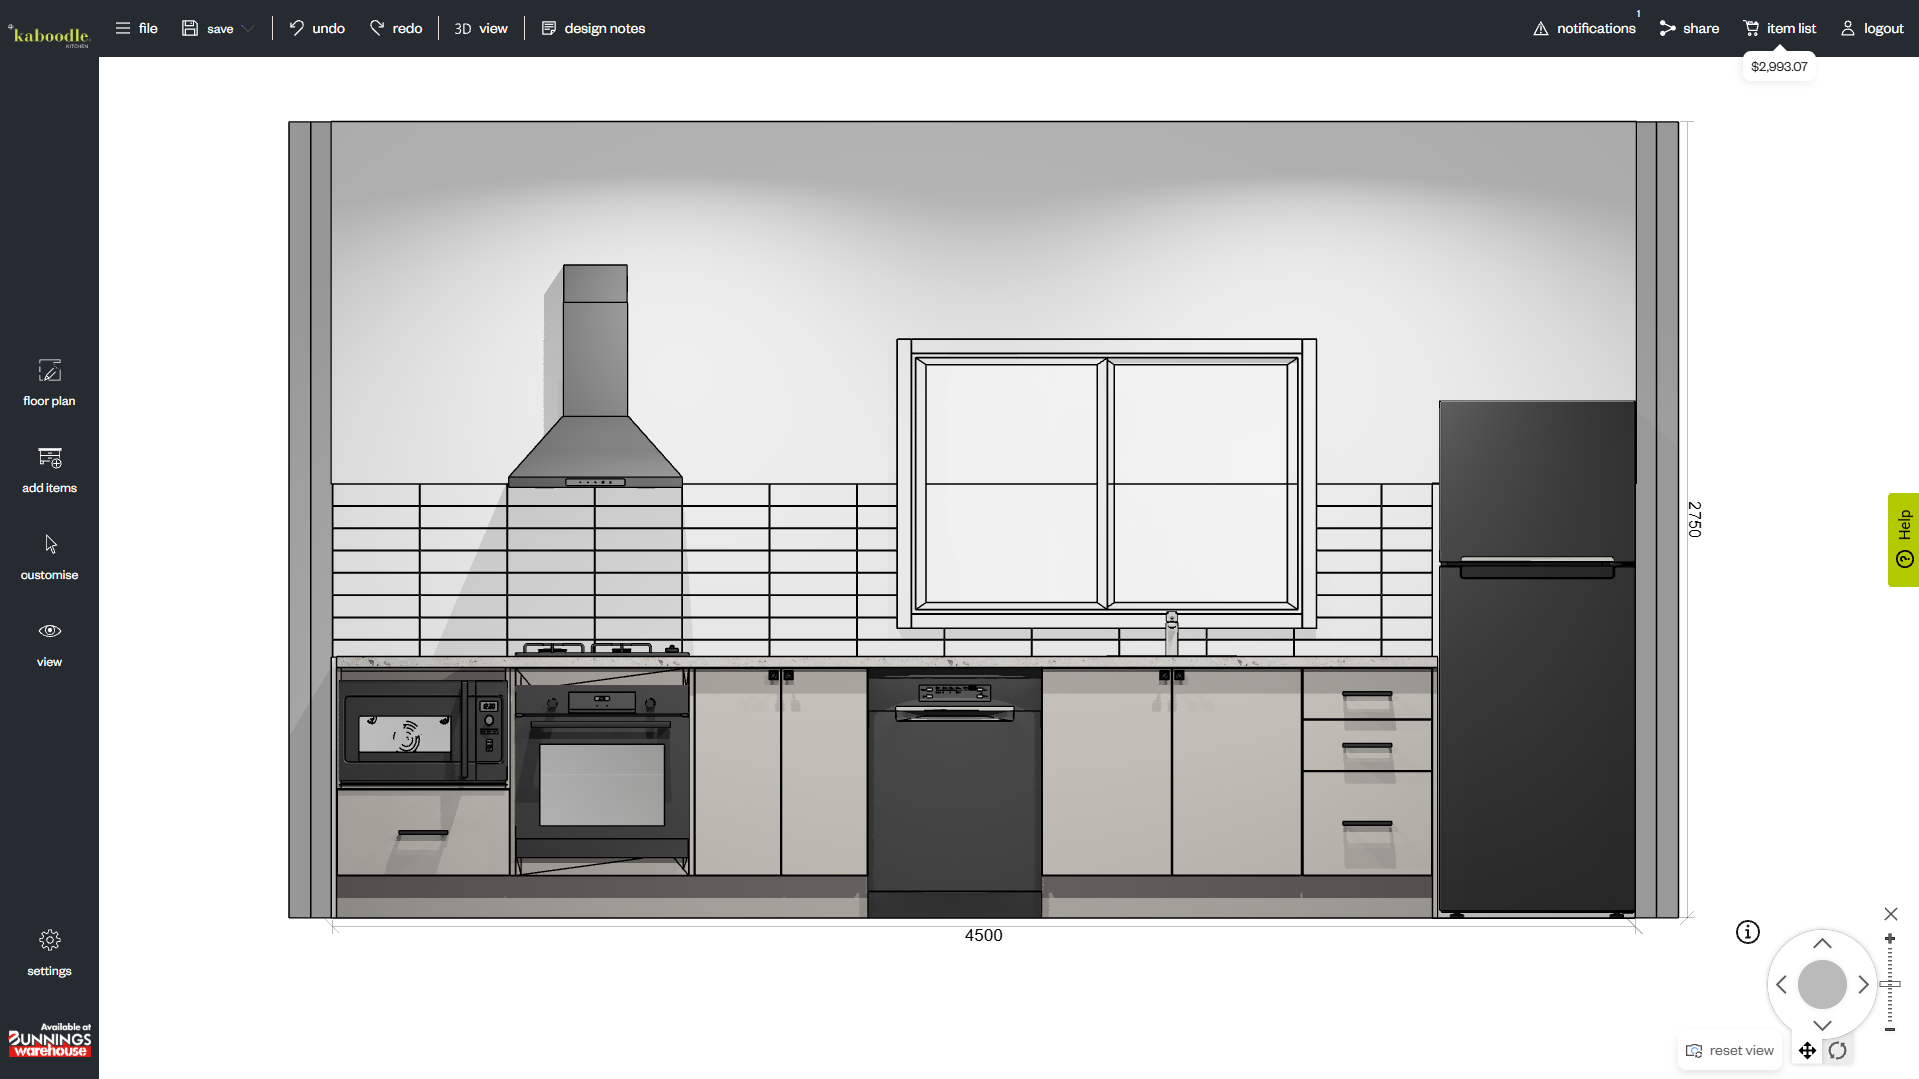
Once you've added your cabinets, benchtops, appliances and accessories, take a moment to review the overall layout.
Check that your items are positioned correctly and that your cabinetry works with the room dimensions, doors and windows you set up earlier. This is a great time to check that all filler and end panels have been included where required. Make any necessary adjustments before moving on to the finer details of your design.
With your products in place, you're one step closer to creating a kitchen or laundry that suits your space and your style.
For more ideas and information, visit our design blog and image gallery, or follow us on Instagram, TikTok, Facebook and Pinterest.