how to set up your room in the kaboodle 3D planner
Before you start designing your dream kitchen or laundry, it's important to get your room dimensions and layout right. Setting up your room in the 3D planner is a critical part of the design process, ensuring your room dimensions are reflected in the planner. Follow these simple steps to set up your room and get started with your design.

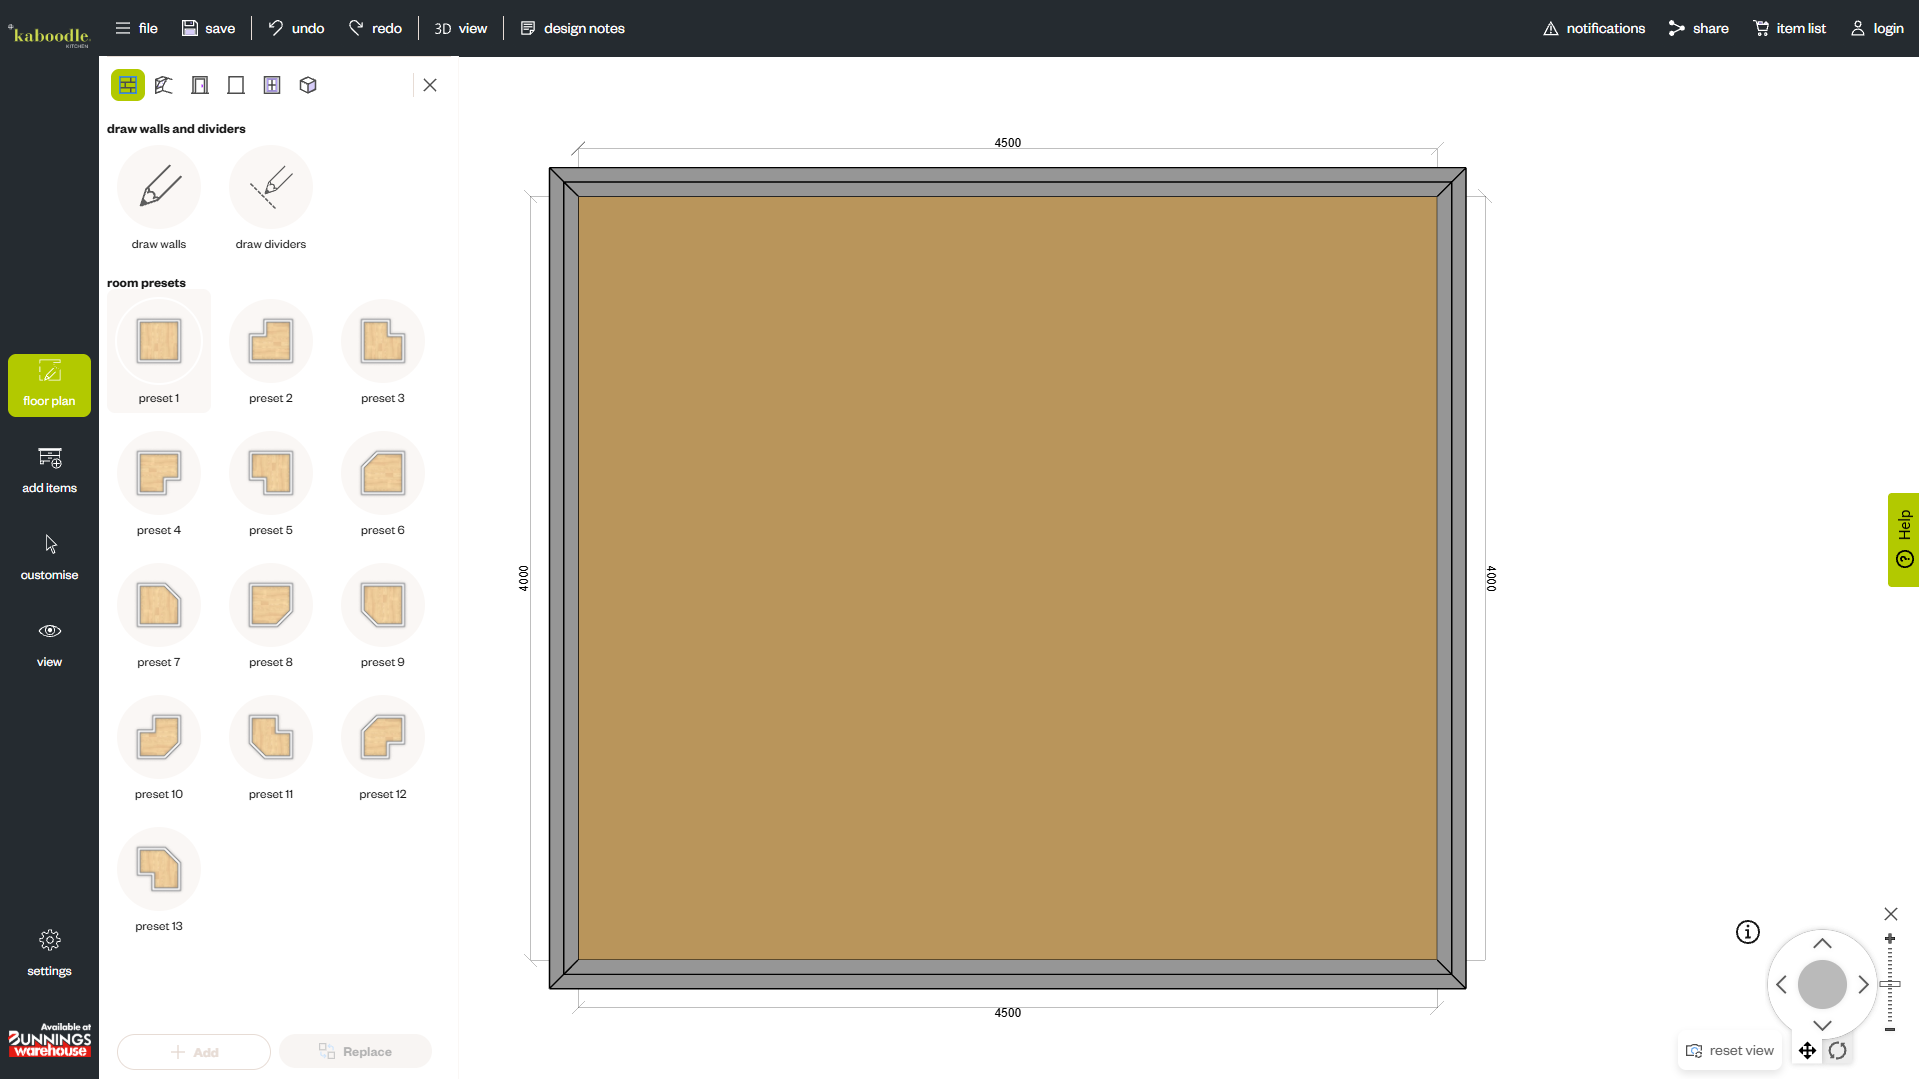
step 1: set your room shape and dimensions
Start by opening the Floor Plan menu and switching to 2D Top View. This view makes it easier to create your room layout and adjust its dimensions.
Choose a preset room shape, such as a square or rectangle, to suit your space. If your room has an unusual layout, select Draw Walls to create a custom shape.
Once you've selected your room shape, hover over each wall dimension and enter the correct wall length. Be sure to measure your space carefully before entering your measurements.
With a wall selected, open the Dimensions tab to adjust additional settings, including wall thickness and ceiling height.
Tip: Ceiling height applies to the entire room. If your space has a sloped ceiling, you can account for this by selecting the Sloped Ceilings option.
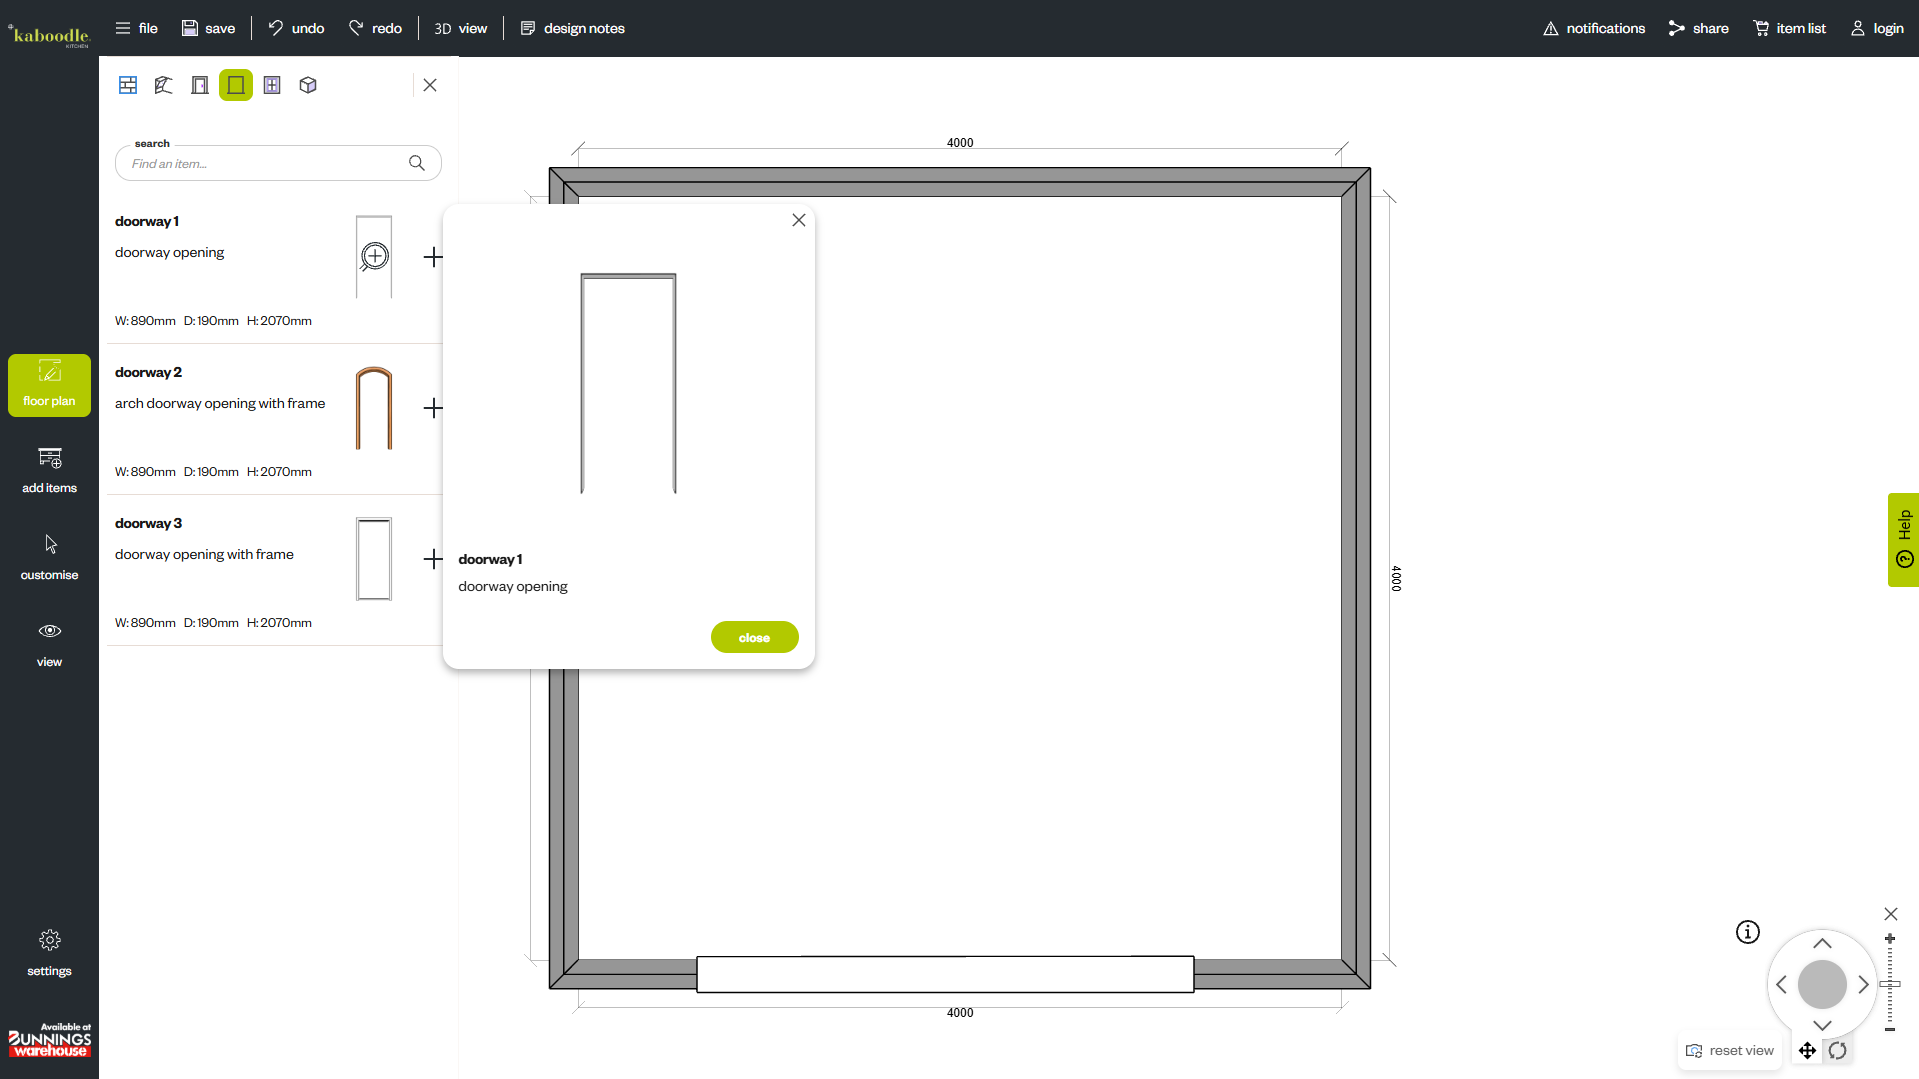
step 2: add doorways and openings
Once your room shape and dimensions are set, it's time to add any doorways or other openings that will affect your kitchen or laundry layout.
Open the Floor Plan menu and navigate to the Openings tab. Choose your preferred opening type and select Add to place it on a wall.
To adjust the size of your opening, either drag the arrows to resize it or select the opening and enter your exact measurements in the Dimensions tab.
Positioning doorways correctly helps you plan your cabinetry around entry points and account for the available space within your room.
step 3: add and position windows
Next, open the Windows tab to add windows to your room. You can use the drag-and-drop method to place a window directly onto the wall where you want it positioned.
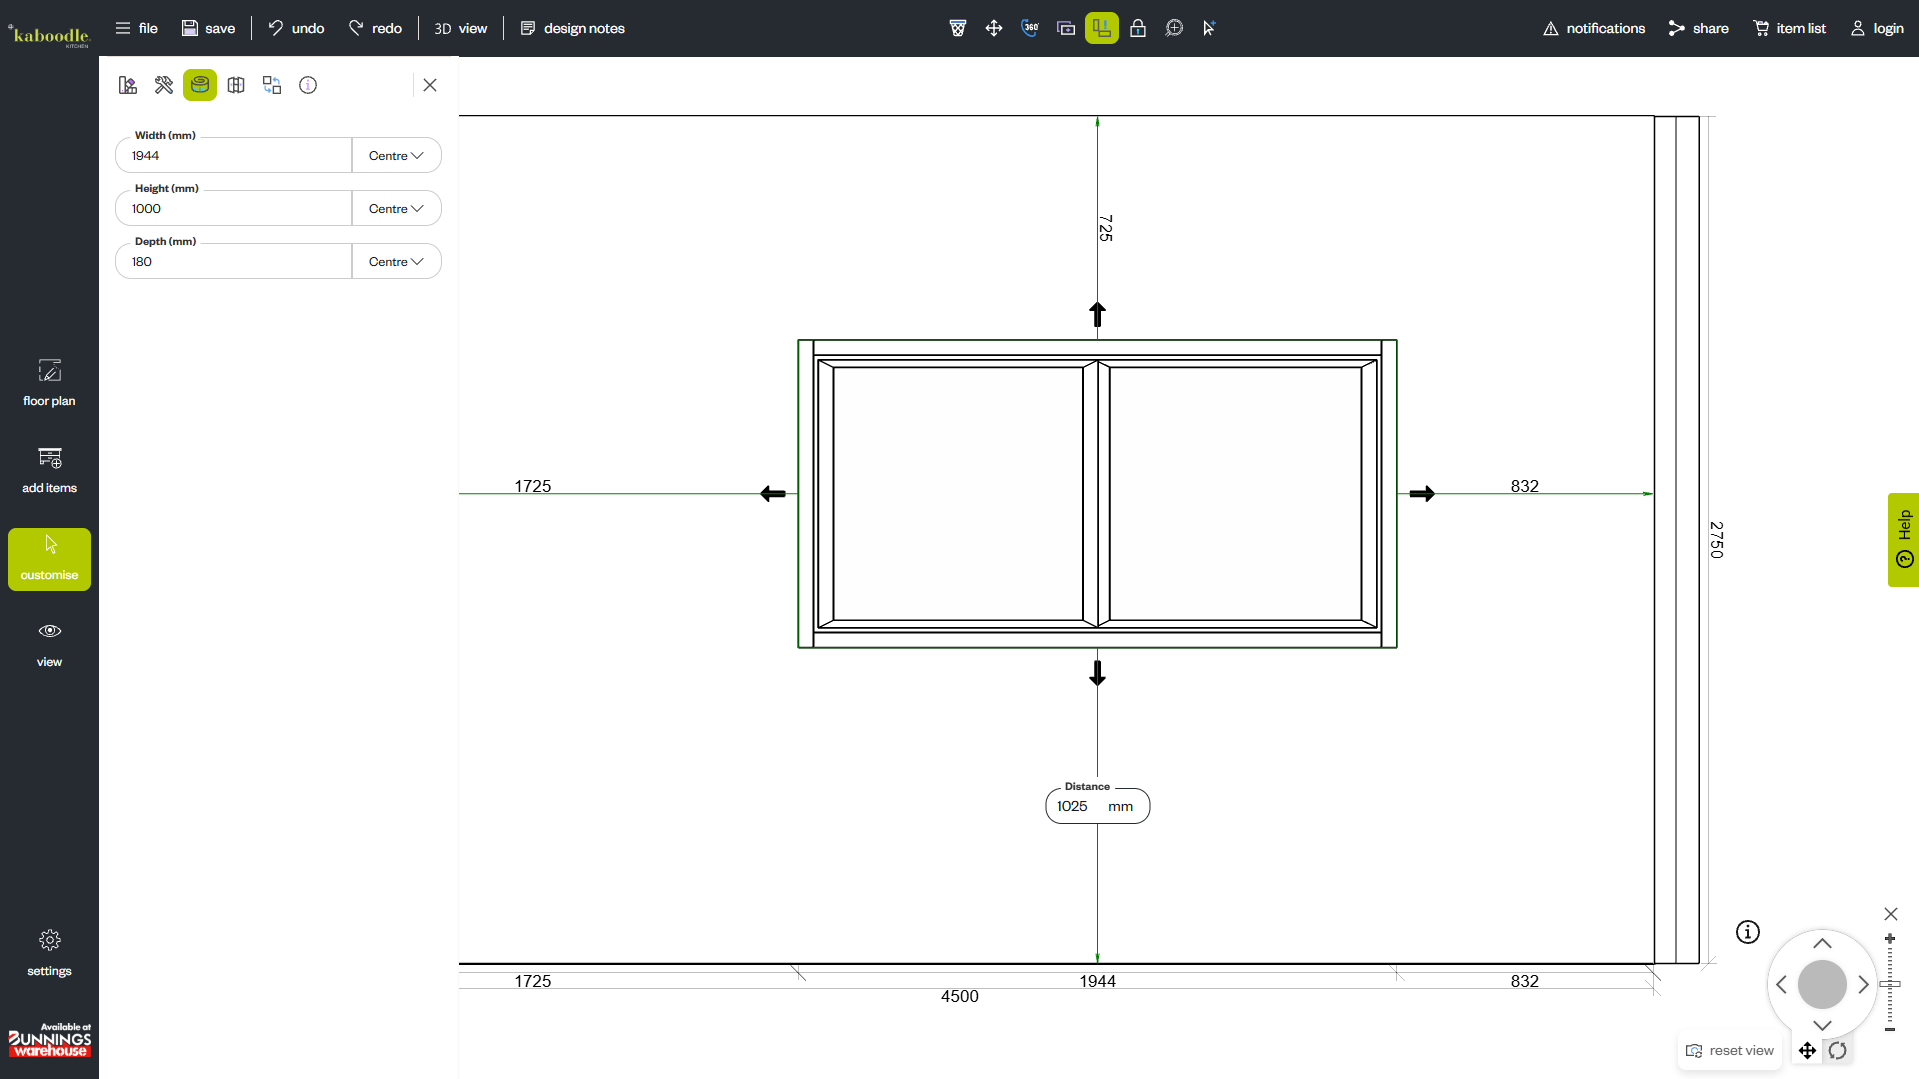
For greater accuracy, select the relevant wall and switch to Elevation View. This view allows you to see the wall from the front, making it easier to adjust the window's position and dimensions.
Select the window and open the Dimensions tab to change its size and position.
You can move the window by dragging it into place or enter the displayed distance measurements for a more precise result. For example, if the bottom of your window sits 1025 mm above the floor, enter 1025 mm as the vertical distance.
Repeat this process for the remaining measurements until your window is positioned correctly.
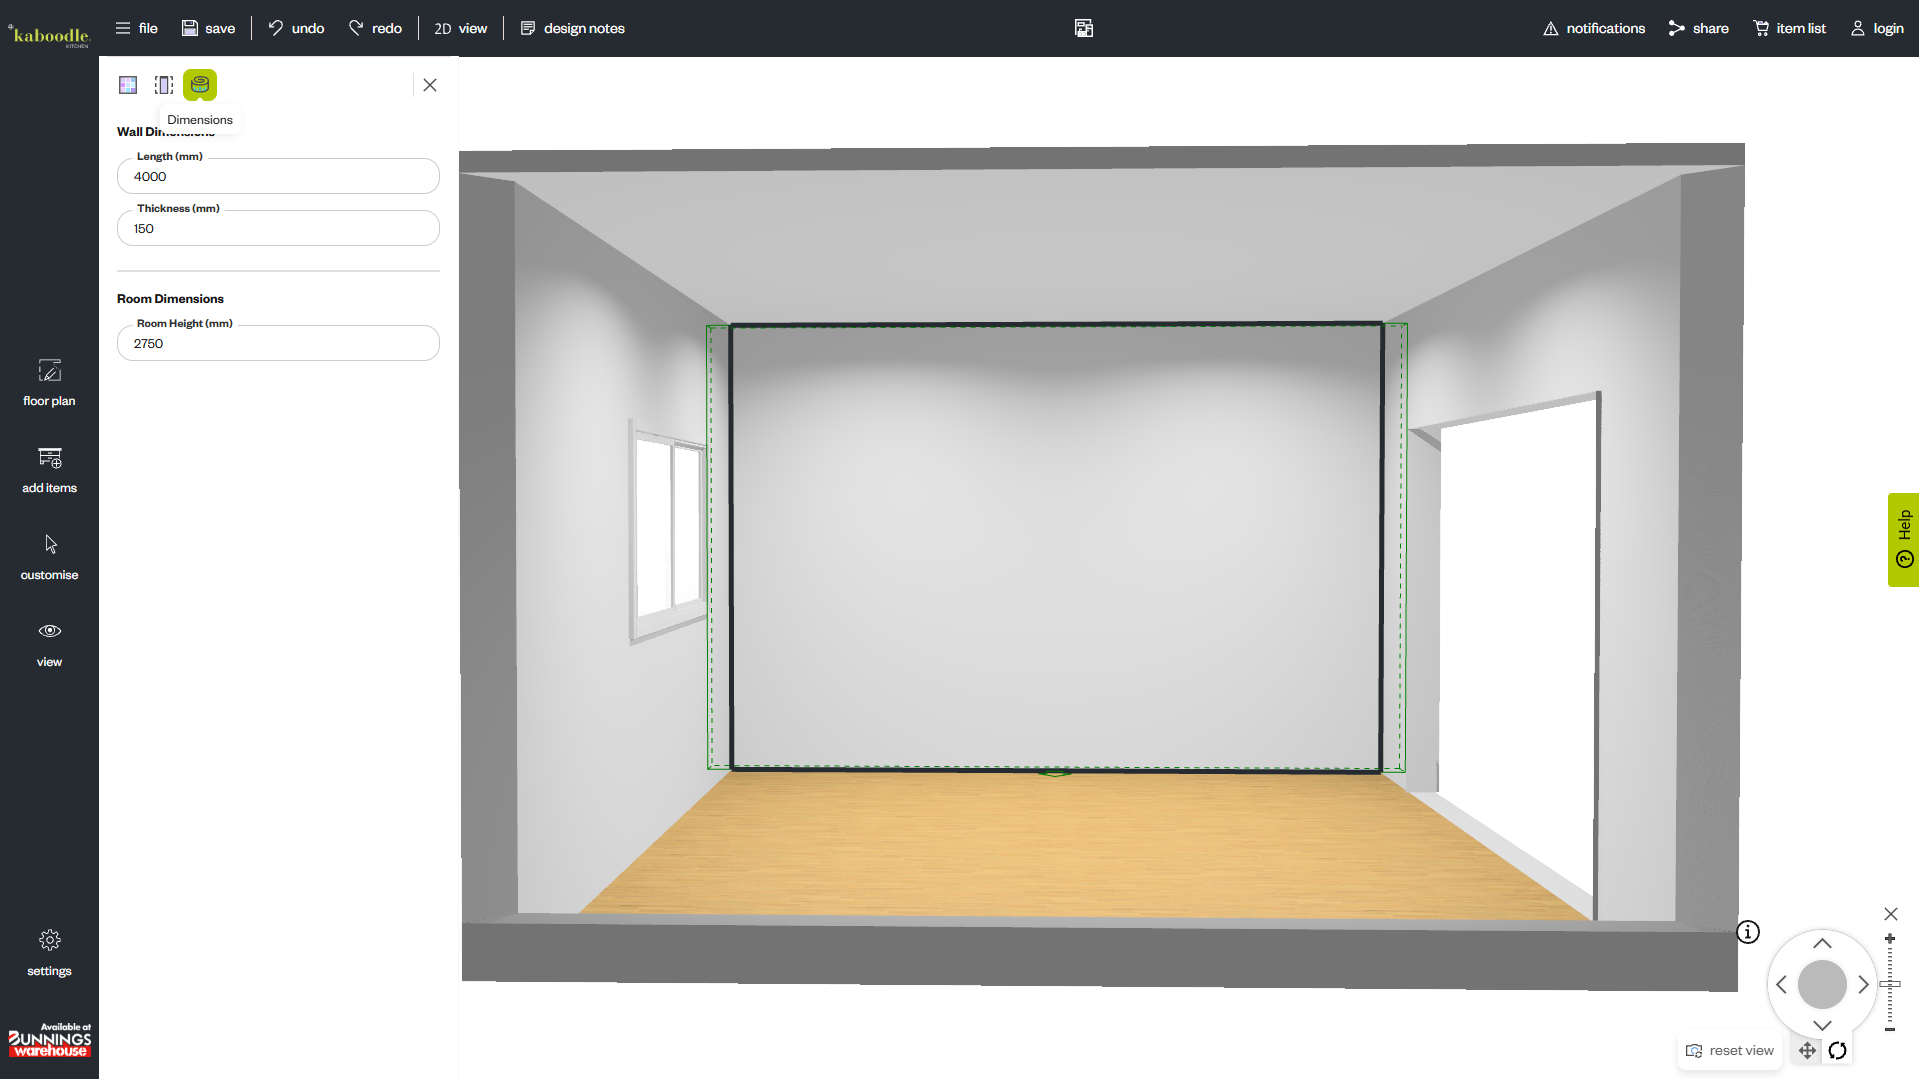
step 4: check your room layout
Before moving on to your cabinetry design, take a moment to review your room setup. Check that your wall lengths, ceiling height, doorways and window positions accurately reflect your space.
Getting these details right from the beginning will help you create a more practical kitchen or laundry layout and make the most of your available space.
Once you're happy with your room setup, you're ready to start designing!
For more ideas and information, visit our design blog and image gallery, or follow us on Instagram, TikTok, Facebook and Pinterest.